CAD incorporation notes
Aim
The aim of this work is to utilise an open source CAD kernel (at this stage OpenCasCade has been chosen) to incorporate CAD models directly into Cmgui. This will be done so that Cmgui can directly query aspects of the imported model and manipulate it.
Current Status
The current version in the repository is the Beta version.
Beta version
Cmgui will create fields out of CAD entities loaded in via step or iges files. A topological field is created to represent the CAD topology, this field in itself has no components and doesn't respond to locations, thus a topological field is just the domain of the CAD shape. Instead two dependent fields are created: a cad geometric field; a cad colour field. These fields will respond to locations, the geometric field will respond to locations over its source domain and is used to render the CAD shape.
When you import a CAD entity from a file an "RGB" spectrum is also created (if it doesn't already exist) this is to facilitate the colouring of a geometric field with a cad colour field.
Only surfaces of a CAD topology can currently be rendered, curves and points are on the yet to be implemented list.
Prototype version
Points, lines and surfaces have successfully been imported into cmgui from three different file formats. Namely brep, iges and step. Higher level information colours, layers and volume properties can now be read in.
Current Issues
- OpenCASCADE has a bug in reading in iges files that consist of assemblies. Colour information is lost in most circumstances in this case.
Current Work Focus
- Looking at how to select cad fields
Having a play yourself (On Linux)
Setting up openCasCade
Go here and download OpenCASCADE_src.tgz, (you may need to register to be able to download this tarball). Decompress the tarball with this command:
tar -xzf where/you/downloaded/the/file/to/OpenCASCADE_src.tgz -C where/you/want/files/to/be/decompressed/to
This will create a directory called OpenCASCADE6.3.0 (current version).
OpenCASCADE6.3.0 comes with ready to use build files. If you:
cd OpenCASCADE6.3.0/ros/adm/make
make
make install
OpenCASCADE will build and install itself. Alternatively OpenCASCADE can be reconfigured using autoconf and automake, here is an example:
cd somewhere/OpenCASCADE6.3.0/ros
flags="--x-includes=/usr/X11R6/include/X11"
flags="$flags --x-libraries=/usr/X11R6/lib"
flags="$flags --with-tcl=/usr/lib"
flags="$flags --with-tk=/usr/lib"
flags="$flags --disable-debug --enable-production"
flags="$flags --disable-wrappers --disable-wok --disable-draw"
./configure $flags --prefix=${HOME}/local/usr
It is probably a good idea to change the --disable-draw flag to --enable-draw. This way you can play with OpenCASCADE after finishing this part of the guide. typing:
./configure --help
will give you a list of options that can be manipulated. After configure has finished successfully do:
make && make install
at this point you might have to run libtoolize, ?because some macros are out of sync?:
libtoolize --copy --something
you will get a message to this effect if it is the case.
Finally OpenCasCade requires a few environment variables to be set for proper operation:
export CASROOT="/where/opencascade/is/installed/to"

export CSF_MDTVFontDirectory=$CASROOT/src/FontMFT
export CSF_LANGUAGE=uk
export MMGT_CLEAR=1
export CSF_EXCEPTION_PROMPT=1
export CSF_SHMessage=$CASROOT/src/SHMessage
export CSF_MDTVTexturesDirectory=$CASROOT/src/Textures
export CSF_XSMessage=$CASROOT/src/XSMessage
export CSF_StandardDefaults=$CASROOT/src/StdResource
export CSF_PluginDefaults=$CASROOT/src/StdResource
export CSF_XCAFDefaults=$CASROOT/src/StdResource
export CSF_StandardLiteDefaults=$CASROOT/src/StdResource
export CSF_GraphicShr=$CASROOT/lib/libTKOpenGl.so
export CSF_UnitsLexicon=$CASROOT/src/UnitsAPI/Lexi_Expr.dat
export CSF_UnitsDefinition=$CASROOT/src/UnitsAPI/Units.dat
export CSF_IGESDefaults=$CASROOT/src/XSTEPResource
export CSF_STEPDefaults=$CASROOT/src/XSTEPResource
export CSF_XmlOcafResource=$CASROOT/src/XmlOcafResource
These environment variables need to be exported for your current shell but it is a good idea to put it into your .bashrc file (or equivalent). That should be it for OpenCasCade.
Using openCasCade in Cmgui
There is a branch in the repository cmgui-cad that contains the source code for this addition. Check it out and then create a symbolic link from $CMISS_ROOT to where OpenCasCade is installed, for example:
ln -s /usr/openCAsCade6.3.0 $CMISS_ROOT/occ
or as from the example above:
ln -s $HOME/local/usr $CMISS_ROOT/occ
Now build Cmgui as per normal (look here for reference).
Beta version
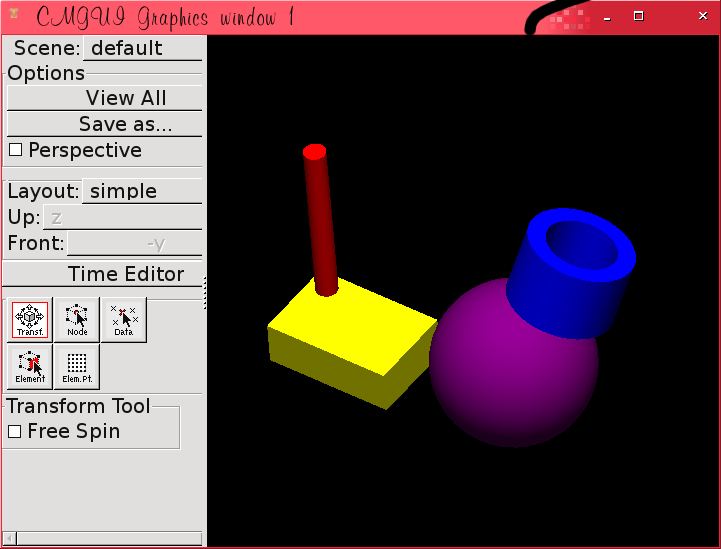
Once Cmgui has compiled you might want to see something for your work. Download this step file and this Cmiss command file and save them in the directory where your executable exists, then:
./cmgui cmgui_cad_example.cmiss
In the graphics window you should see something like this

Protoype version
Once Cmgui is compiled a typical command for a user 'bob' to load a data file 33_moto.brep would be:
gfx import file /home/bob/data/33_moto.brep as motorbike material gold
gfx draw motorbike_lines
gfx draw motorbike_surfaces
gfx create window
This assumes user 'bob' has saved the brep file '33_moto.brep' in a folder called 'data' in his home directory. The result of these commands should display a gold motorbike, if all goes well.
You can also add:
gfx draw motorbike_points
and draw a point cloud, which will be very hard to see unless you create bigger point glyphs. Which you could do if you changed the first command above to:
gfx import file /home/bob/data/33_moto.brep as motorbike material gold glyph sphere lengths 5
Future Work
Add some API for calculating distance from a point on a field to a point on the imported model
More Future than Future Work
Add some API for manipulating an imported model in cmgui
